How I Edit: Finishing Up
Posted 11 years, 5 hours ago.
Ok, so far we’ve taken our recordings, cleaned them up, cut them up and managed to get something edited. Good job, everyone! High fives all around! We’re in the final stretch now.
The next bit is taking the audio from Logic Pro X (or your editor of choice) and getting something resembling an MP3 to release. In Logic, this is called bouncing, and even though you could just bounce an MP3 from Logic directly, I do just a little bit more work to make things just right.
Obviously, parts of this process will vary from editor to editor. I’ve not used a bunch of other editors, and really this is just my process. Your mileage may vary.
Bouncing
The first thing we want to do is select all of the blocks in your project. ⌘+A should do the trick nicely. The reason for this is that Logic doesn’t assume the end of your project is the final block on your tracks. Selecting blocks tells it to bounce from the start of the selection to the end of the selection. If you select all the blocks, it’ll bounce all the audio, and you won’t end up with a weird stretch of silence at the end.
Once you’ve done this, open the Mixer. You can get at it from Window > Open Mixer in the menu bar, or your toolbar might have a mixer icon on the left side:
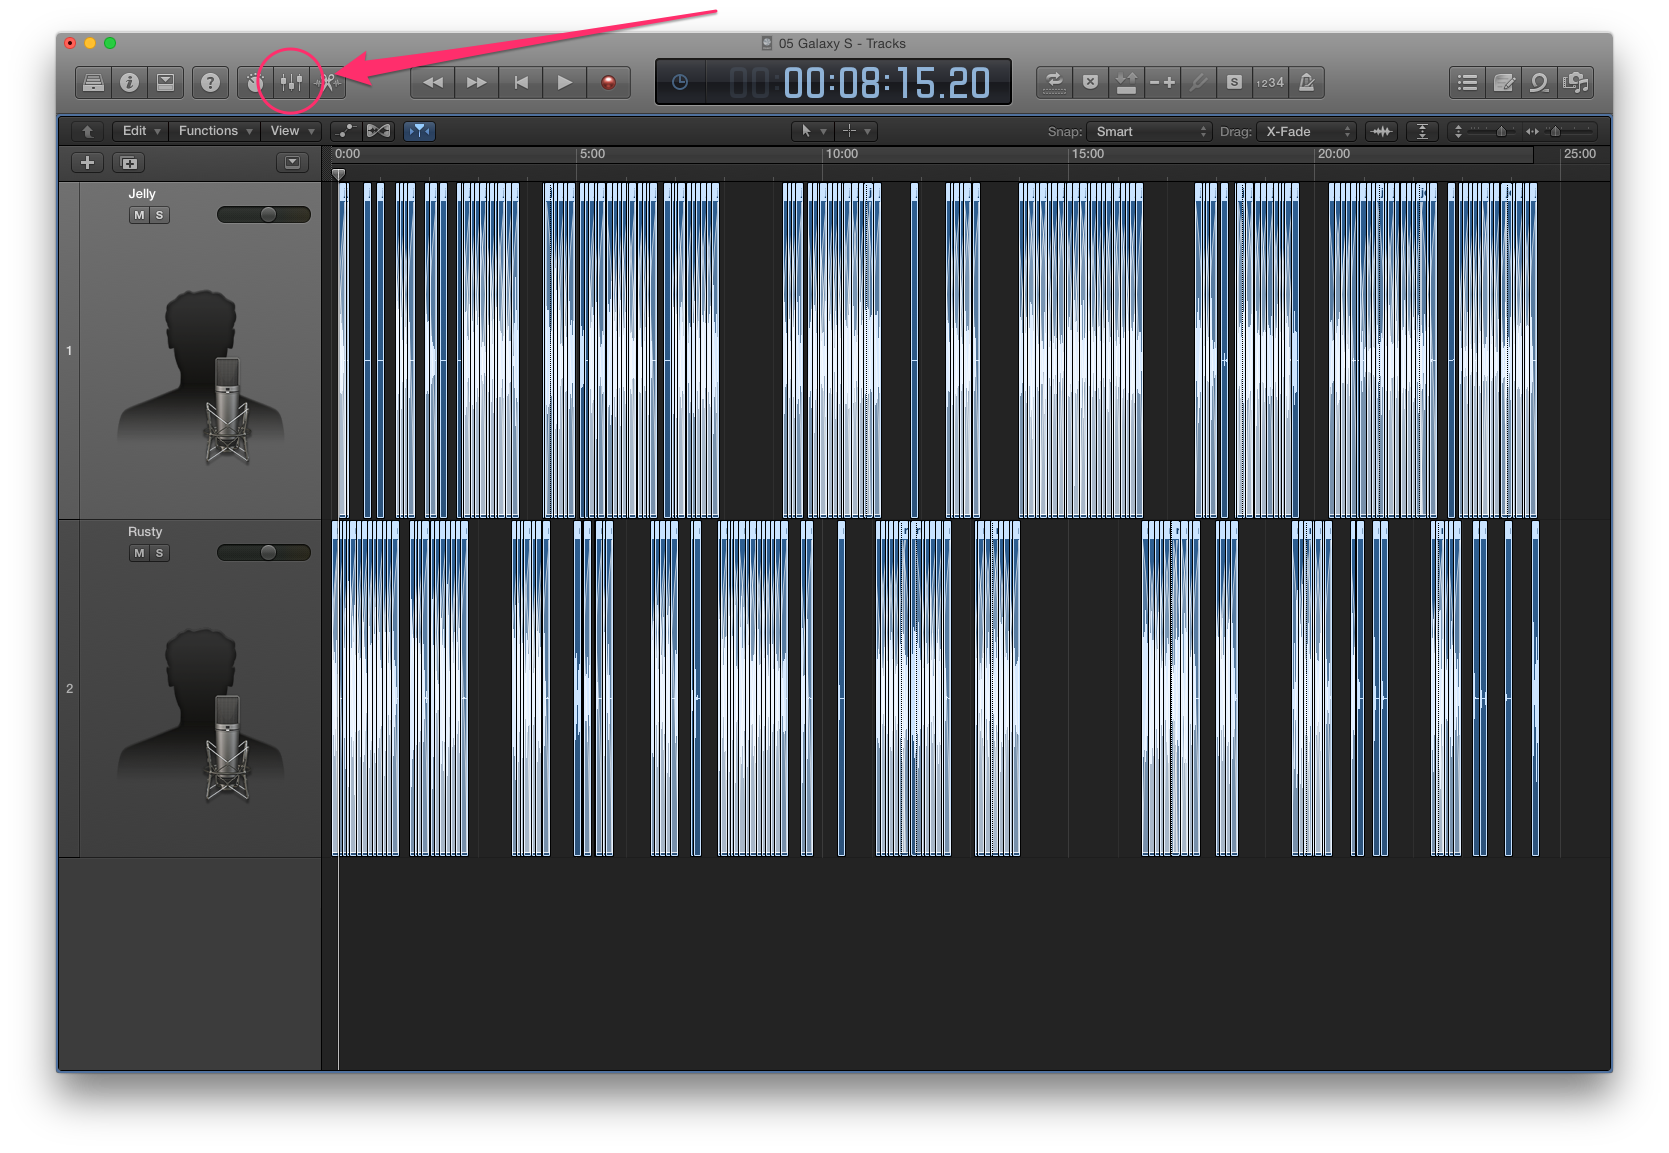
The mixer icon looks like a mixer. Long live skeumorphism!
In the mixer, you’ll find more information about your tracks, plus an output and master track. For the purposes of bouncing, there’s two pieces of interest here.
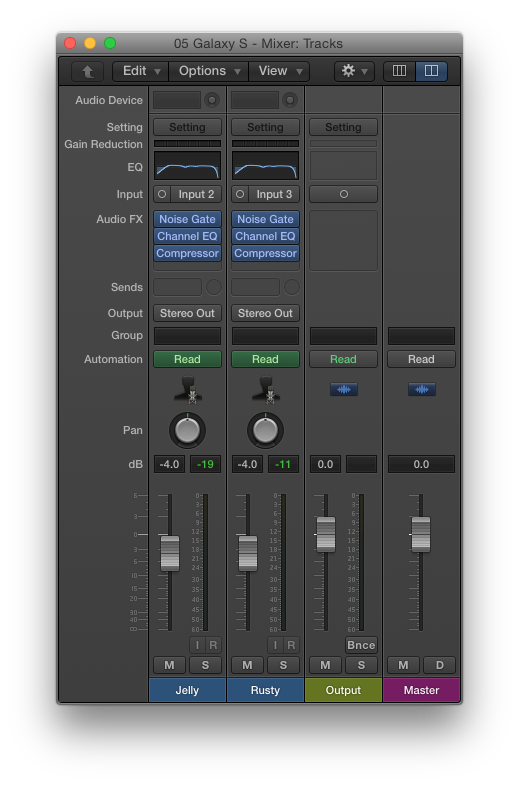
This is the audio editing equivalent of an easter egg hunt.
First we want to ensure the output audio is mono (mono files are way smaller than stereo files). On the row of buttons labeled “Input”, you’ll see a bunch of circles. A single circle indicates mono, two overlapping circles means stereo. Clicking should toggle between the two. If the output track is showing as stereo, click the button until it’s showing as mono.
The next step is to actually bounce. At the bottom of the output track you’ll see a button labelled “Bnce”. Clicking this opens the bounce window.
You could also open this window from File > Bounce > Project or Section, or by hitting ⌘+B, but there’s a secret that the little “Bnce” button holds. The bounce window defaults to bouncing in stereo, but this little button makes it reflect the input setting for the output track. So, since we’ve already changed the Input to mono, clicking this button will bounce our track in mono! Hooray!
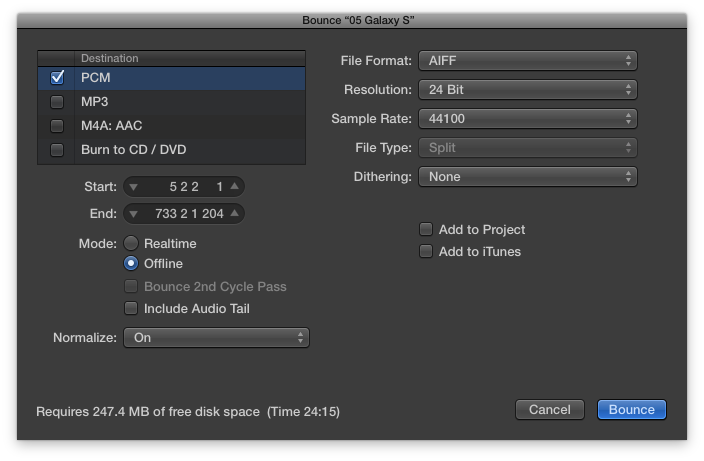
My settings for bouncing from Logic Pro X
Compressing
I personally bounce from Logic in AIFF, because of two reasons. Firstly, I’ll be doing another pass of compression on the audio in Audacity, and I’ve also found Audacity to compress the audio file better. So using AIFF saves the time that Logic would spend compressing the audio file, since we’ll be opening and compressing it again later anyway.
Open the AIFF file you’ve bounced from Logic in Audacity. Just like we did the first time around, apply Compression using the Effects > Compressor tool. I use the exact same settings I showed in Pre-Processing the Audio, so you can probably just hit OK and let Audacity do its thing here.
Exporting
Once you’re done, we export from Audacity the same way we did before, using File > Export…, this time saving the file as an MP3. There is a small caveat here, though: Audacity requires the LAME MP3 encoder, which is a separate install. This is a one time thing, and it’s not terribly difficult.
Once you’re past that little hurdle, you can just select MP3 from the format dropdown in the export sheet, and adjust the output options as you see fit.
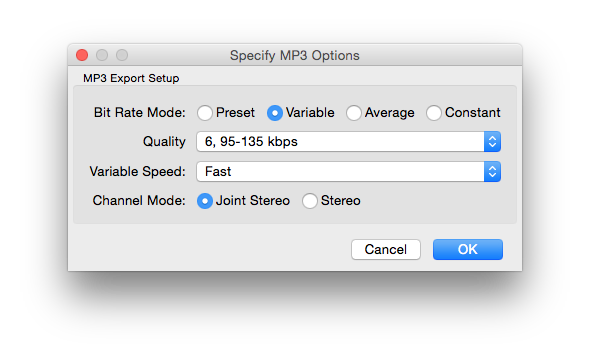
My settings for exporting as MP3 from Audacity
Tagging
Once again, I skip Audacity’s tag editor window, and instead, use a little app for editing the meta tags on the MP3. Many people use iTunes for that, but I’ve always been a stickler for keeping my iTunes library clean, so I currently use an app called Tag, which is on the Mac App Store for AU$6.49.
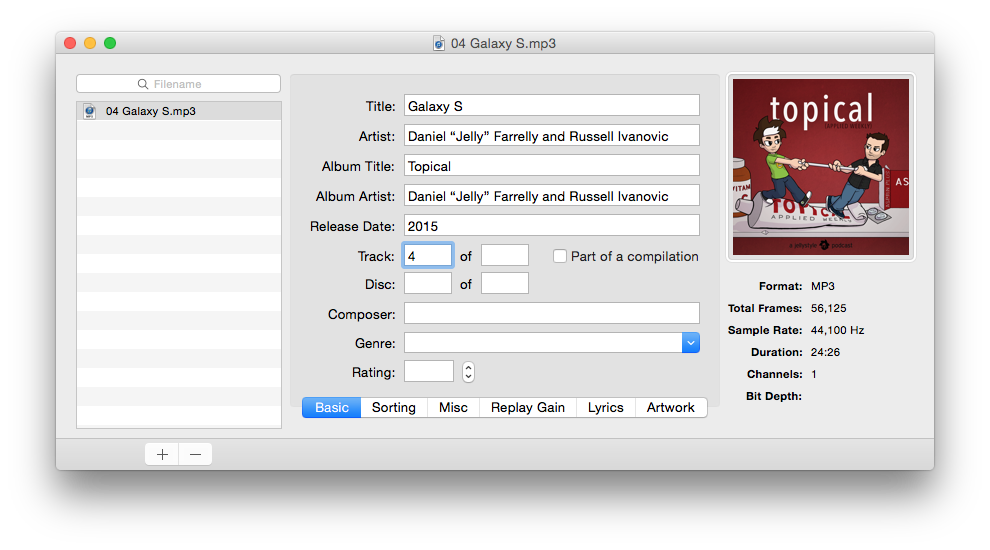
Looks like we decided to shuffle the episodes and release this one early.
I usually apply the basic information, add the show blurb as the comment and “lyrics”, add the album art as the “Front Cover”, and run Tool > Calculate Replay Gain… because why not?
Conclusion
Some might say I’m crazy to spend so much effort editing shows. Isn’t Topical supposed to be light-hearted and fun? Does audio quality really matter when it comes to amateur podcasts? Doesn’t spending hours on editing make you hate doing it?
The answer to all of these questions is that I hold myself to a high standard. It matters more to me that I can be proud of the final product than to let something I’m not happy with slip out into the world because I didn’t have the time to give to it. There is, of course, a balance to be struck here (as with everything), but for me, I feel like if I’m not making the best thing I can, I might as well not do it at all.
You might be different, and that’s ok. My process might be too in-depth for you, and that’s fine too. The important thing here is that I think anyone can learn this. I’m not an audio guy, and yet, I’ve taught myself, and now others, to edit together podcasts that have excellent quality.
Go therefore and do the same.
Other Posts in the “How I Edit” Series
- How I Edit
- Pre-Processing the Audio
- The Basics of Editing
- Stitching Words
- Finishing Up (This Post)